.png)
If you are developing custom activewear, one of the easiest mistakes to make is treating sampling like small-batch production.
A brand owner emailed me recently and asked, “I have sketches. Can you make 10 pieces so I can test the market?” I asked whether she meant development samples to verify fit and construction, or small production units to sell. She thought they were the same thing.
They are not.
The activewear sampling process exists to turn a design idea into a production-ready product. It helps you verify fit, fabric performance, color accuracy, construction details, and quality standards before you commit to bulk production. If you skip the right sample stages, problems usually appear later—when they are much more expensive to fix.
In this guide, I will walk you through the full process:
- what happens from tech pack to bulk production
- what each sample type means
- how lab dips, strike-offs, and fabric testing fit in
- how long sampling and production usually take
- where brands lose time, money, and margin
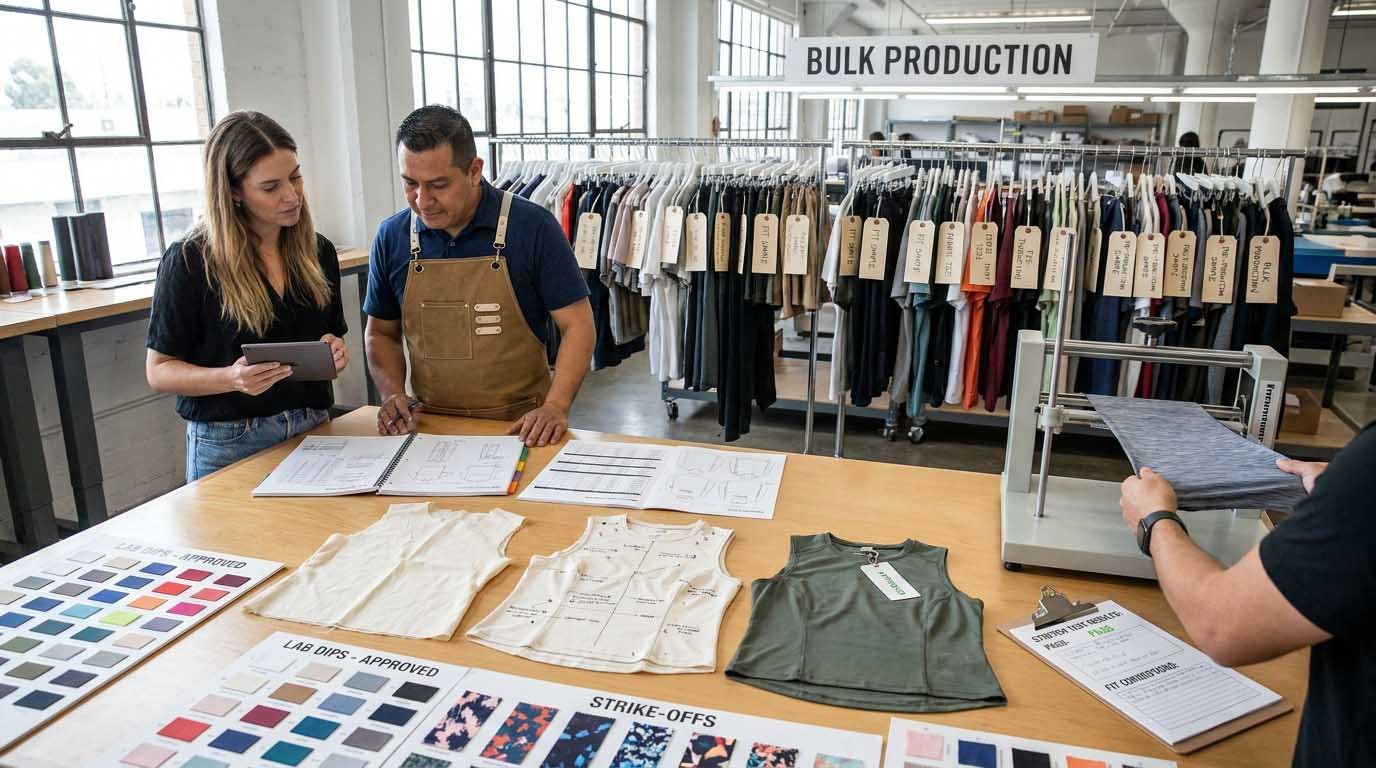
Quick Answers: Activewear Sampling and Production
If you need the short version first, here it is.
What is the activewear sampling process?
It is the step-by-step product development workflow that takes your design from tech pack to approved bulk production. It usually includes proto sample, fit sample, pre-production (PP) sample, and sometimes size set or salesman sample.
How long does activewear sampling take?
For a new custom style, sampling usually takes 8-12 weeks before bulk production starts. Reorders with no major changes are much faster.
What is the difference between proto, fit, and PP sample?
- Proto sample checks whether the design can be made
- Fit sample checks sizing, proportion, and movement
- PP sample checks the final product using bulk fabric before production starts
Do I need lab dips or strike-offs?
- Lab dips are for solid dyed colors
- Strike-offs are for printed fabrics or graphics
Is sampling expensive?
Sampling often costs far less than fixing bulk production mistakes. In most cases, proper sampling is the cheapest part of risk control.
Key takeaway:
Sampling is not a formality. It is your main protection against wrong fit, wrong color, wrong fabric, and wrong construction in bulk production.
What Starts the Process: Tech Pack and T&A Calendar
Before sampling begins, two things should be clear:
- your tech pack
- your T&A calendar
Without these, timelines become vague and decisions get delayed.
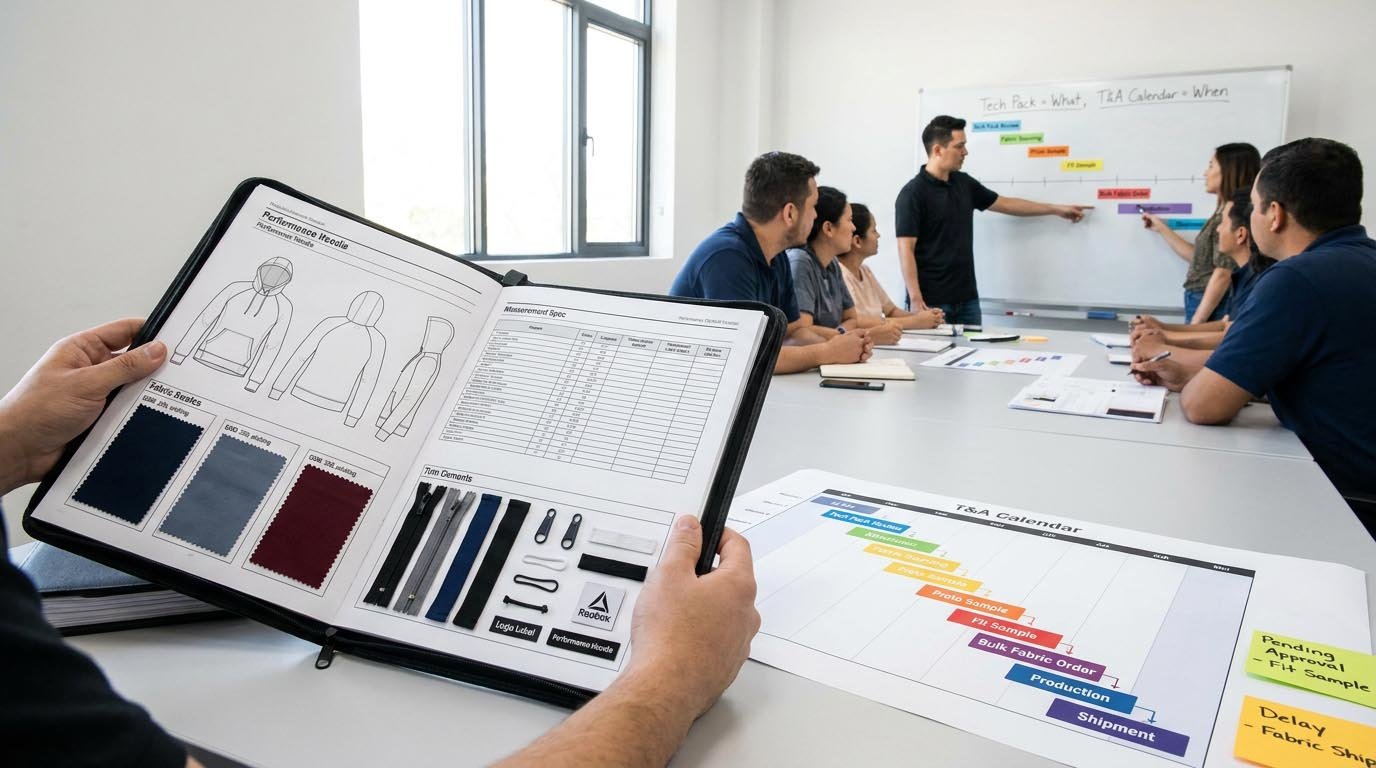
What a Tech Pack Needs
A proper tech pack is more than a sketch. It should give the factory enough information to build the style correctly.
Typical tech pack contents:
- flat sketches of front and back
- measurement chart with grading
- fabric composition and target GSM
- stretch or compression requirements
- seam and stitch details
- trim details such as elastics, zippers, labels, cords
- logo placement and artwork notes
- packaging and care label requirements
If your tech pack only says things like:
- “soft hand feel”
- “high waist”
- “moisture-wicking”
- “premium quality”
...that is not enough.
A factory still needs to know:
- what rise measurement defines “high waist”
- what GSM range counts as acceptable
- what fiber blend you want
- whether the fabric should be brushed or smooth
- how much stretch and recovery is required
Why unclear tech packs slow everything down
A weak tech pack usually leads to:
- extra back-and-forth before sampling starts
- wrong assumptions by the factory
- more sample revisions
- longer lead times
In practice, incomplete specifications can easily add 1-3 weeks before the first usable sample is even made.
What a T&A Calendar Does
T&A means Time and Action calendar.
It is your production roadmap. It shows:
- each milestone
- target dates
- who is responsible
- what must be approved before the next step
Typical T&A milestones:
- tech pack submission
- costing review
- fabric sourcing
- lab dip or strike-off approval
- proto sample
- fit sample
- bulk fabric order
- PP sample
- cutting
- sewing
- finishing
- final inspection
- shipment
Simple example of a T&A calendar
| Milestone | Typical Timing |
|---|---|
| Tech pack review | 3-5 days |
| Sample material sourcing | 7-10 days |
| Proto sample | 10-12 days |
| Fit sample and revisions | 2-4 weeks |
| Bulk fabric production | 15-25 days |
| PP sample | 7-10 days |
| Bulk production | 4-6 weeks |
| Final inspection and packing | 5-7 days |
Where delays usually happen
Most delays do not come from “one big problem.” They come from:
- slow sample approvals
- changed design decisions after sampling starts
- missing fabric approvals
- unclear revision comments
- mills taking longer than expected on dyed fabric
Key takeaway:
A tech pack tells the factory what to make. A T&A calendar tells everyone when each decision must happen.
Fabric Development: Lab Dips, Strike-Offs, and Fabric Testing
A fabric swatch can show you how something looks and feels. It does not tell you everything you need to know before production.
That is why fabric development usually includes:
- lab dips
- strike-offs
- performance testing
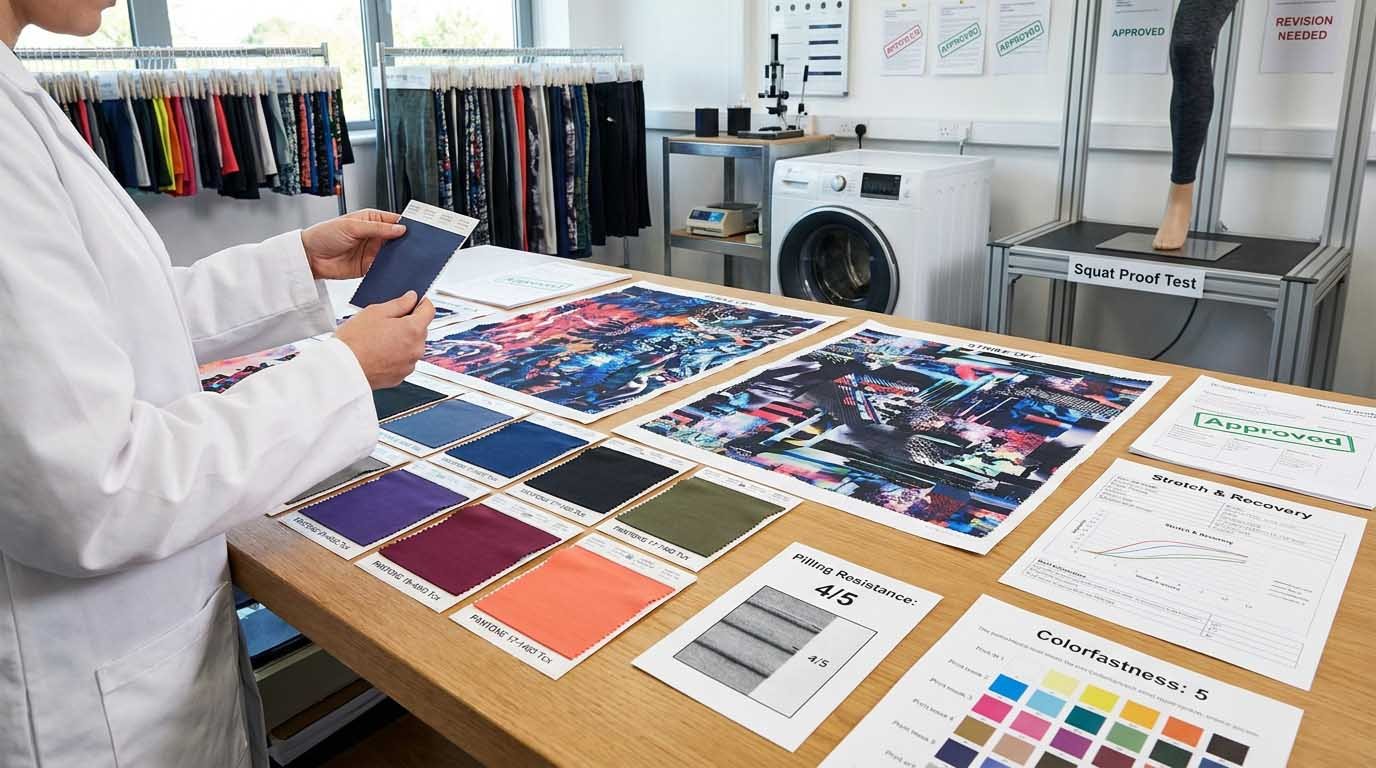
Lab Dips: For Solid Colors
A lab dip is a small dyed fabric swatch used to check color accuracy before bulk dyeing.
Use lab dips when:
- you are developing solid color garments
- you want to match a Pantone or physical color reference
- the exact shade matters for branding or collection consistency
What lab dips help prevent
Without approved lab dips, brands often run into:
- bulk fabric arriving too light or too dark
- incorrect undertones
- color mismatch between sample and production
Typical lab dip timeline and cost
- Timeline: about 7-10 days per round
- Cost: usually $50-100 per color
- Rounds: often 1-3 rounds
Best practices for lab dip approval
- review in natural daylight if possible
- compare against physical references
- approve in writing
- remember that textile dyeing is not the same as printing on paper
Strike-Offs: For Prints and Graphics
A strike-off is a printed fabric sample used to confirm:
- print quality
- color accuracy
- artwork clarity
- repeat pattern
- print placement
Use strike-offs when:
- your activewear uses custom prints
- you have all-over patterns
- you use sublimation or digital print
- you want to test graphic placement before production
Typical strike-off timeline and cost
- Timeline: about 10-15 days
- Cost: usually $100-200 per design
Fabric Testing: What Matters for Activewear
For activewear, appearance is not enough. Performance matters.
Core tests worth considering
1. Shrinkage / dimensional stability
Checks how much the fabric changes after washing.
Why it matters:
- if fabric shrinks too much, sizing changes after first wash
2. Colorfastness
Checks whether color fades or bleeds during washing, rubbing, or sweat exposure.
Why it matters:
- activewear is exposed to friction, sweat, and frequent washing
3. Pilling resistance
Checks whether the surface forms pills under friction.
Why it matters:
- leggings, bras, and tops often experience high rub areas
4. Stretch and recovery
Checks how far the fabric stretches and whether it returns properly.
Why it matters:
- poor recovery means garments can bag out after wear
5. Opacity / squat proof testing
Especially important for leggings and fitted bottoms.
Why it matters:
- fabric that goes sheer under stretch becomes a product complaint immediately
Typical testing budget
Depending on how many tests you run, testing may cost roughly $500-1,200 per fabric program.
That may sound expensive early on, but it is usually much cheaper than producing hundreds of units in the wrong fabric.
Key takeaway:
Swatches show appearance. Testing reveals performance.
Sample Types Explained: Proto, Fit, Size Set, PP, SMS, and TOP
This is where many brands get confused.
They receive one sample, like it, and assume the product is ready for production. In reality, different sample stages solve different problems.
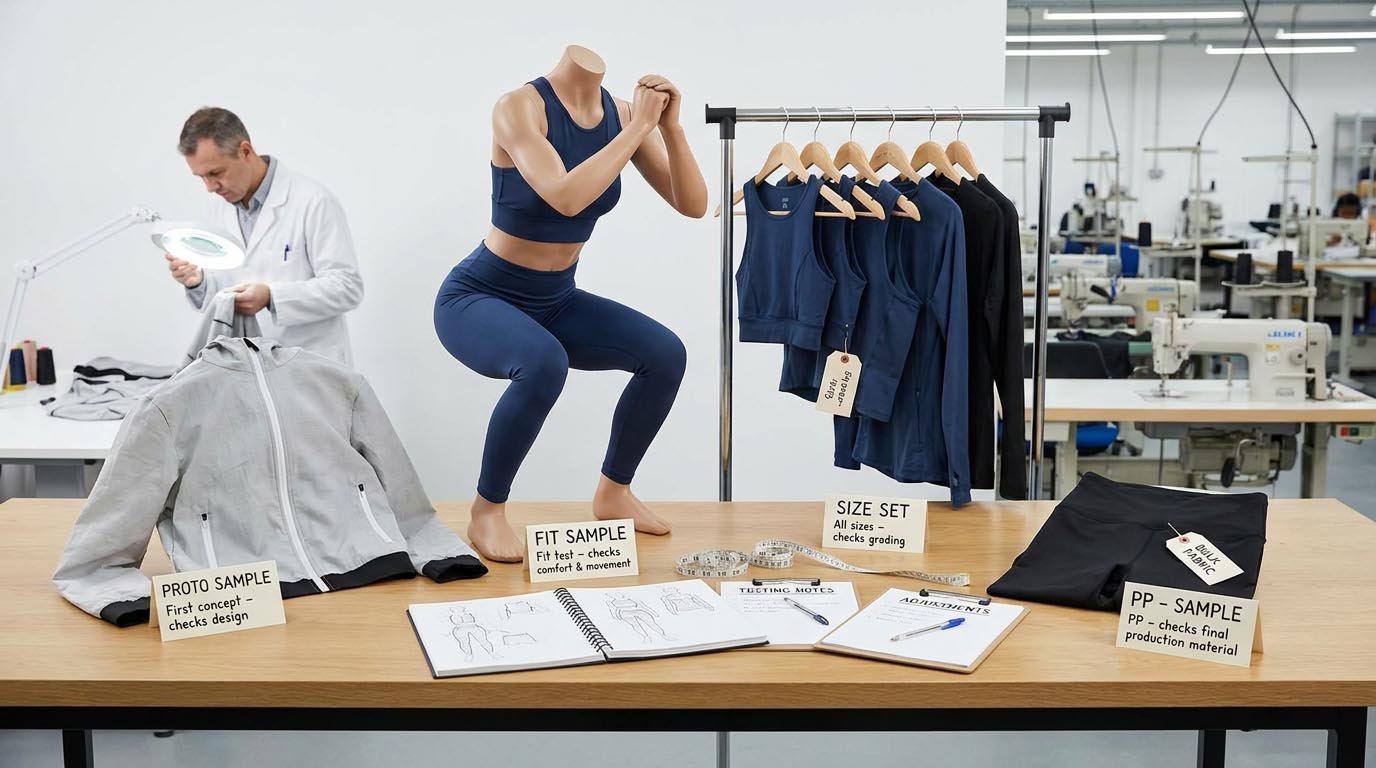
Proto Sample
A proto sample (prototype sample) is the first physical version of the design.
Its job is to answer:
- can this design actually be made?
- do the proportions look right?
- do the construction methods make sense?
- are any design details visually or technically wrong?
What proto samples are not for
Proto samples are not your final quality benchmark.
They may use:
- substitute fabric
- temporary trims
- basic finishing
- a single middle size
Typical proto sample use
This is where you may discover:
- seam placement looks awkward
- a waistband is too wide
- a mesh panel is structurally weak
- the design needs simplification for manufacturing
Typical proto timeline
About 10-15 days
Fit Sample
A fit sample is used to check how the garment fits on a body and how it performs in movement.
Its job is to answer:
- does the size fit correctly?
- are length, rise, support, and compression right?
- does the garment stay in place during movement?
- are there any pressure points, pulling areas, or comfort issues?
Fit testing should include:
- standing fit
- seated fit
- movement testing
- functional feedback
For activewear, fit testing should ideally include:
- squats
- bends
- arm raises
- stretches
- movement under tension
Common fit issues found at this stage
- waistband too tight or too loose
- back rise too low
- leg opening too tight
- bra support structure uncomfortable
- straps or seams digging in
Typical fit sample timeline
About 1-2 weeks per round
Many first-time styles need 2-3 fit rounds before approval.
Size Set Sample
A size set sample checks whether grading works across the whole size range.
Instead of testing only one sample size, you review one unit in each size.
Use a size set when:
- the style is new
- fit is central to your product promise
- you are offering a wider size range
- you want to reduce size-related complaints later
What a size set can reveal
Sometimes the middle size fits well, but:
- XS becomes too tight
- XL loses proportion
- grading increments are inconsistent
Can you skip it?
Sometimes yes, especially if:
- the pattern block is already proven
- the design is simple
- budget is tight
But skipping size set increases the chance of size-range issues in bulk.
PP Sample (Pre-Production Sample)
A PP sample is one of the most important stages before production.
It is made using the actual bulk fabric and approved components.
Its job is to confirm:
- bulk fabric matches expectations
- color is acceptable
- hand feel is consistent
- construction still works with production materials
- the final approved sample truly represents what bulk should look like
Why PP sample matters
Small sample yardage and bulk fabric are not always identical.
Even when the fabric spec is technically the same, you can still see variation in:
- shade
- weight
- surface feel
- stretch behavior
A PP sample is the checkpoint before all fabric gets cut.
Key takeaway:
If proto proves the concept and fit confirms the body, PP confirms the real production materials.
SMS and TOP
These are less critical for every startup, but you should know the terms.
SMS = Salesman Sample
A cleaner, presentation-ready sample used for:
- wholesale selling
- buyer meetings
- showrooms
- retail presentation
- photoshoots
TOP = Top of Production
The first approved unit off the production line during bulk production.
Its purpose is to confirm that bulk manufacturing is matching the approved standard.
Some brands do not request separate TOP approval, but the term may still come up during production.
What Happens After Sample Approval: Bulk Production Stages
Once your PP sample is approved, production does not instantly finish. Approval only means the factory can now start bulk execution.
Bulk production usually includes:
- cutting
- sewing
- finishing
- packing
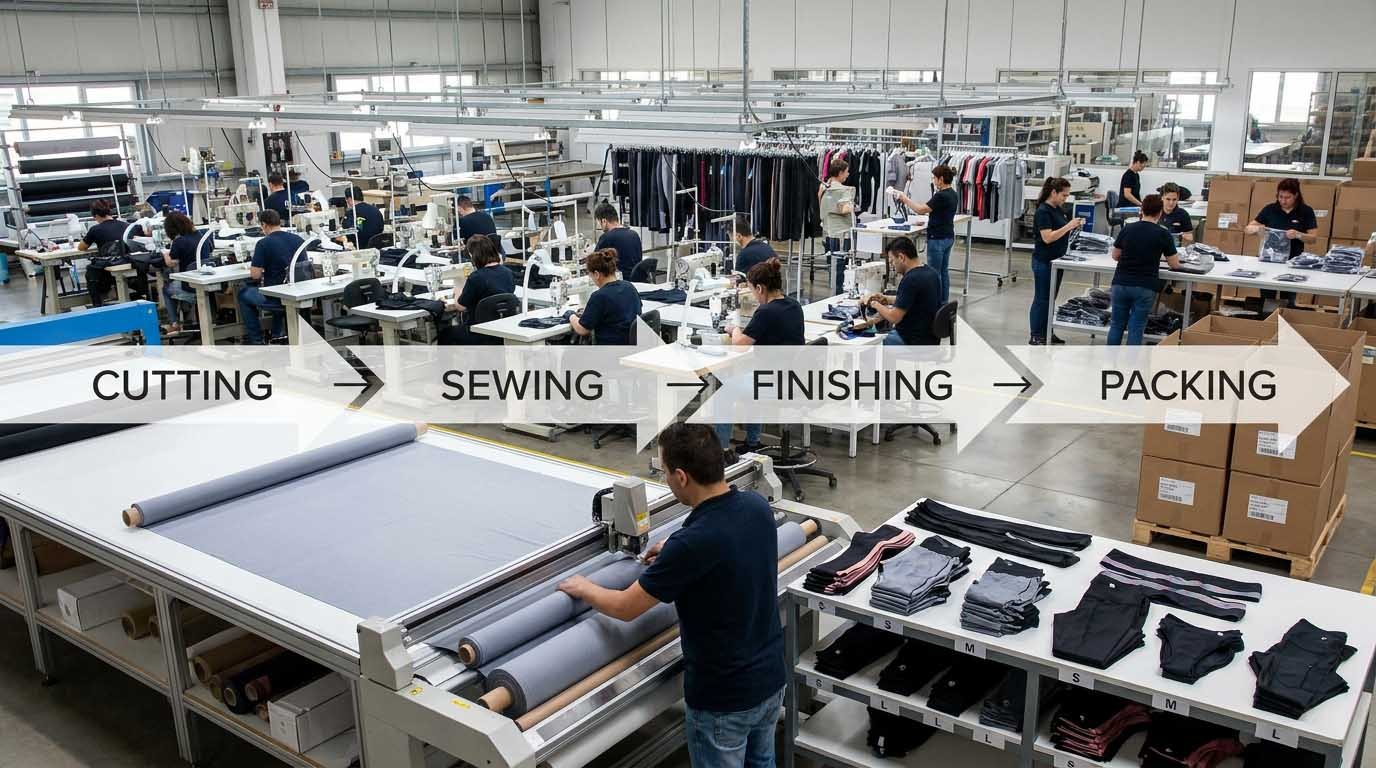
1. Cutting
Before sewing starts, fabric must be:
- inspected
- spread
- marked
- cut accurately
- bundled by size and color
For activewear, this may include multiple components per style:
- front panels
- back panels
- waistbands
- gussets
- pockets
- mesh panels
- trims and labels
Why cutting takes time
Cutting is not just “cut the fabric.”
It requires:
- marker planning for fabric efficiency
- defect avoidance
- accurate layer spreading
- size separation
- bundle control
For a custom order, cutting often takes around 5-7 days, depending on order size and complexity.
2. Sewing
Bulk sewing is very different from sample making.
A sample maker may complete one full garment alone.
A production line breaks the garment into multiple steps across several operators.
Why brands underestimate sewing time
A sample might be made in a day. That does not mean 500 units can be made in a few days.
Bulk sewing includes:
- line setup
- operator training on the style
- production ramp-up
- in-line inspection
- workflow balancing
For activewear, sewing often takes roughly 3-4 weeks for a first custom run, depending on complexity and quantity.
3. Finishing
After sewing, garments usually go through:
- thread trimming
- cleaning
- pressing or steaming
- label attachment
- final quality review
Some products may also include:
- washing
- softening
- shaping
- special finishing treatment
4. Packing
Packing is the last operational step before shipment.
Typical packing tasks include:
- folding
- polybagging
- size sticker application
- carton assortment
- carton labeling
- shipping mark preparation
This stage matters more than many brands realize, especially if you sell to:
- retailers
- marketplaces
- fulfillment centers
- 3PLs with carton rules
Key takeaway:
Sample approval starts production readiness. It does not mean the order is ready to ship next week.
Quality Control, Lead Times, and Cost Planning
If you want fewer surprises, this is the section that matters most.
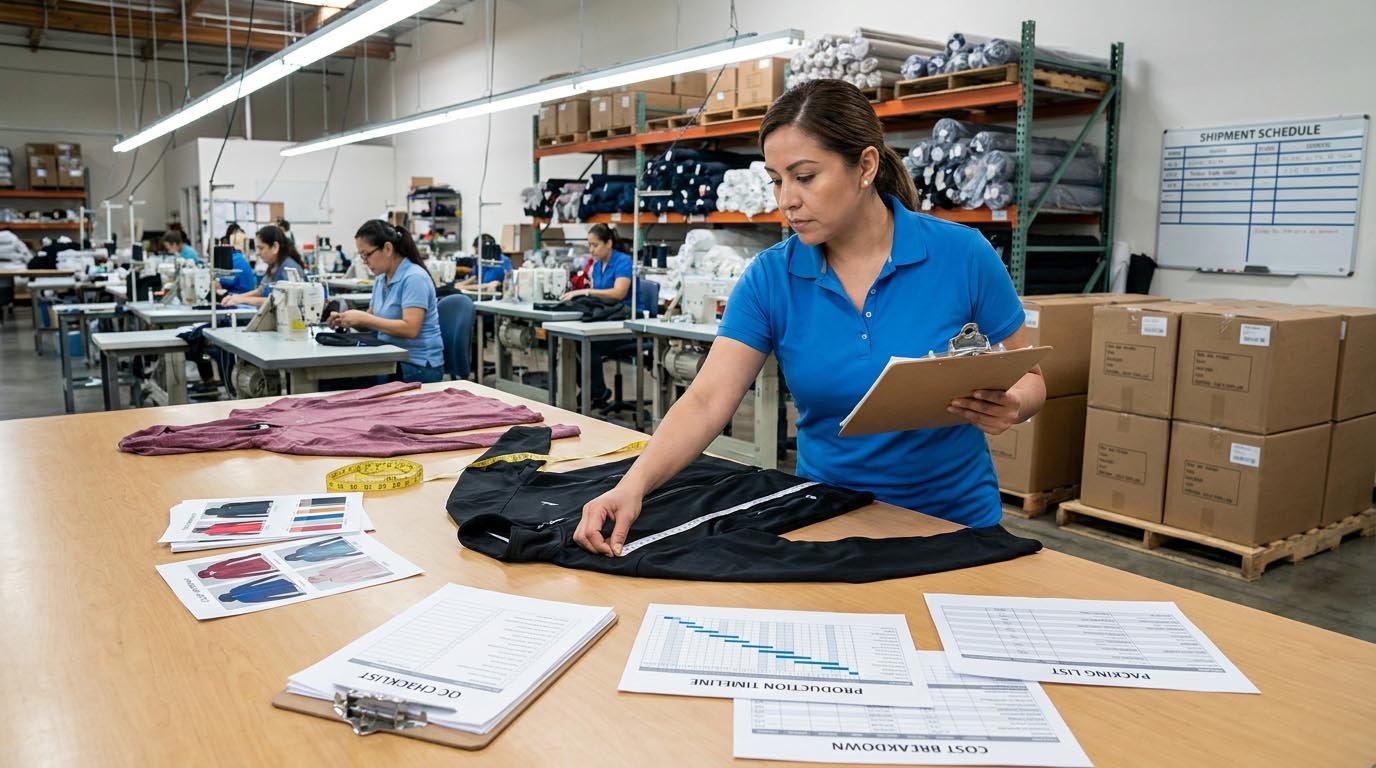
Main Quality Control Checkpoints
A good activewear production process usually includes several QC checkpoints.
1. Incoming fabric inspection
Checks:
- shade consistency
- visible defects
- GSM
- width
- quantity received
2. Cutting inspection
Checks:
- pattern accuracy
- piece count
- cut quality
- size and bundle control
3. In-line inspection
Checks:
- seam quality
- construction consistency
- measurement spot checks
- operator errors before they spread
4. Final inspection
Checks:
- measurements
- appearance
- labeling
- workmanship
- functionality
5. Third-party inspection (optional but useful)
Especially useful for:
- first orders
- large orders
- new supplier relationships
- buyers who cannot visit the factory
Before moving into bulk production with a new supplier, brands should also verify whether the factory can consistently maintain these quality controls. Our Activewear Factory Audit Checklist: 15 Questions Brands Should Ask provides practical questions, evidence requirements, and warning signs for evaluating manufacturing capabilities.
What Documents Help Protect You
For smoother production and fewer disputes, keep documentation clear.
Useful documents include:
- approved sample photos
- signed or written sample approval notes
- updated measurement sheet
- fabric test reports
- T&A calendar updates
- inspection reports
- packing list
- purchase order and revision history
If something goes wrong later, documentation matters more than memory.
Realistic Lead Times
One of the biggest problems in apparel development is unrealistic timeline expectations.
Typical timing for a first custom activewear style
| Phase | Typical Duration |
|---|---|
| Tech pack review and clarification | 3-7 days |
| Sample material sourcing | 7-15 days |
| Proto sample | 10-15 days |
| Fit sample rounds | 2-4 weeks |
| Bulk fabric production | 15-25 days |
| PP sample | 7-10 days |
| Bulk production | 4-6 weeks |
| Final QC and packing | 5-7 days |
| Shipping | 1 week by air / 3-5+ weeks by sea |
Practical planning rule
For a first custom order, plan for about:
- 8-12 weeks to complete sampling
- 6-8 weeks for bulk production and freight preparation
- more if you are using sea shipping or making multiple revisions
That means a first custom activewear order can easily take 16-20+ weeks from first clean tech pack to delivered goods.
Can you shorten it?
Sometimes, yes—but always with trade-offs.
Ways to shorten timeline:
- use stock fabric
- reduce revision rounds
- skip size set
- use air freight
- simplify construction
What you usually cannot compress much:
- bulk fabric dyeing time
- proper sample review time
- physical production capacity
- freight transit reality
Cost Planning: What Brands Should Expect
Costs vary by:
- fabric type
- style complexity
- order volume
- number of sample rounds
- test scope
- shipping method
Cost categories to plan for
-
development costs
- samples
- pattern work
- testing
- revisions
-
production costs
- fabric
- trims
- cutting
- sewing
- finishing
- packaging
-
logistics costs
- freight
- duties
- inspections
- customs handling
For first-time custom activewear, brands often underestimate the cost of development. The unit price may look fine, but the total landed cost becomes higher after samples, testing, and shipping are added.
Key takeaway:
Do not budget only for “piece price.” Budget for development, QC, and delivery too.
FAQ: Activewear Sampling Process
Can I start selling from my proto sample?
You can use it for early concept review or internal feedback, but a proto sample is usually not the safest reference for final sales use. It may not reflect final fit, materials, or finishing.
How many sample rounds do new activewear brands usually need?
For a new custom style, 2-3 rounds is common. Some simple styles need fewer. More technical styles may need more.
Do I always need a size set sample?
Not always. If the style is simple and grading is based on a proven block, you may skip it. For fit-sensitive styles, it is often worth doing.
What is the most important sample before production?
Usually the PP sample, because it verifies the actual production fabric and approved materials before bulk cutting starts.
Can I change the design after sample approval?
Yes, but any late change can affect:
- cost
- lead time
- fabric usage
- pattern work
- production scheduling
Minor changes are manageable. Major changes often restart part of the process.
What if the bulk order does not match the approved sample?
That depends on:
- what was documented
- what tolerance was agreed
- whether the order passed inspection standards
This is why clear approvals, measurements, and QC reports matter.
How long should I plan from tech pack to delivered goods?
For a first custom order, a realistic planning range is often 16-20+ weeks, depending on complexity, approvals, and shipping method.
Is sampling worth the money?
Yes. In most cases, the cost of proper sampling is small compared with the cost of getting bulk production wrong.
Final Takeaway
The activewear sampling process is not just about getting “a sample.” It is about reducing risk before you commit to bulk production.
A strong process usually looks like this:
- start with a clear tech pack
- build a realistic T&A calendar
- approve lab dips or strike-offs when needed
- test the fabric, not just the look
- use the right sample stages for the style
- approve a proper PP sample before bulk cutting
- track QC and keep documentation clear
If you rush through development, problems usually appear later—during bulk production, after delivery, or after customers start wearing the product.
If you plan the process properly, sampling becomes what it should be:
the cheapest place to find and fix expensive mistakes.
Need Help Planning Your Activewear Sampling Process?
If you are developing a new activewear style, send us:
- your product type
- target quantity
- launch deadline
- whether you already have a tech pack
- whether you need OEM, ODM, or sample development support
We can help you estimate:
- which sample stages you really need
- where the main risks are
- how long the process is likely to take
- what to prepare before bulk production starts